25
Dec
12

So, it’s been a while… What has happened?

I do not even know when I made my last entry!  Apparently, desert racing was still the biggest thing in my life!  Well, I’m glad to say that I’ve gone on to bigger and better things.  Here’s a few of them:


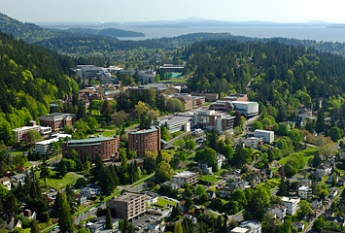
1)  My first official milestone of my life:  I made it into a university to continue my dream of becoming an engineer!  I finished my basic engineering, chemistry, calculus, computer programming, and prerequisite classes at North Seattle Community College.  After that, I moved up to Bellingham to attend Western Washington University.  I attended Whatcom Community College to get my AA direct-transfer degree and really enjoyed that experience.  I finally have a chance to study something that answers all the questions I had when I was involved with desert racing.

Image


2)  My second milestone happened within a few months of the first one!  I had NEVER thought about doing stand-up comedy until maybe July or August of 2012.  Within a month or two, I was doing my first show in front of over 400 people.  I had joined the Stand Up Comedy Klub (S.U.C.K.) on campus and continue to perform at our monthly shows.  I’m hoping to be doing shows at Ryan Stile’s Upfront Theater in town.  I’d like to be able to do shows in Vancouver and Seattle by summer.  I definitely have more than enough material and just have to create a portfolio of videos.

Image

     I’ll just come out and say it: I hate a lot of stand-up comedy.  It bores me or makes me cringe.  I was never the class clown, I never made jokes, and I never dreamed of performing in front of people.  Ever.  All of a sudden, it was ALL that I could think of.  I’m not going to tell you my style, but I’ll give you a hint:  During my first show, I did the following:

  • I tore my clothes off to reveal tight, shiny, leather pants to make fun of 80s metal.
  • I yelled like a mad man about guys who are proud to not do a certain sexual act for their girlfriends.
  • I hired 2 girls who come on stage and lick oversized, hub-cap shaped lollipops as I displayed a clear difference between men and women.  I swear, I’m not a sexist.

All this.. in 6 minutes.


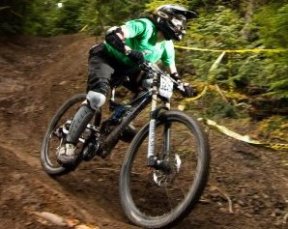
3)  I quit downhill mountain bike racing after I got injured and couldn’t walk for a month.  I started racing again with a real downhill bike (’08 DHR, then Canfield, then V10.3, then V10.4).  I quit, again.  This past summer, I discovered Stevens Pass’s black diamond run and decided to race again.

Image


4)  I’m more healthy than I’ve ever been.

  • I finally started losing weight… a lot of weight.. inadvertently when I started school this past fall.  I decided to make an experiment out of it and see if I can cut weight to below 130lb by New Years.  I started this quarter at 154lbs.  
  • I haven’t been running as much as I’d like to, but I was at 4-5 days a week during summer.
  • I eat a mostly-vegetarian diet (inadvertently).  I simply don’t buy what I don’t want to eat, and buy leafy greens, frozen berries, and bananas to make smoothies.  For protein, I cook up eggs when I feel like it.  Don’t worry, I eat the bad stuff on the weekends with friends.


5)  I have 2 new cats to replace Sherman and Mouse.  The first one was from a local shelter when I still lived in Seattle.  He’s a male tabby and is very troublesome, but affectionate.  The baby is a Scottish Fold that I got when visiting L.A.

Image

Image

Future:

  1. I’d like to go back to MMA training before Winter quarter starts.
  2. I’d like to get ready for the 2013 DH racing season.
  3. I’d like to build up my “Marlboro Racing” 29er DH bike for this upcoming season.  It has just been powdercoated by Devin Lenz and will be shipped soon.
  4. I’d like to build up my video collection of my comedy shows to send to bigger venues.
  5. I’d like to bring my running mileage up.
  6. I’d like to focus more on studying.
  7. I’d like to start a depression/anxiety support group on WWU’s campus.  It’s a pain in the ass to do and I’ll explain that another day.

Currently, my favorite songs are The Cult’s Zap City demo and various Britny Fox stuff.  I welcome 2013 and look forward to working my ass off.
ImageImage

09
Feb
10

The Biggest Chapter of My Life: Desert Racing and Metal Fabrication

Photobucket

When thinking of welding, an image of heavily bearded guys on a construction site comes to mind. However, the aerospace industry uses a much more delicate form of welding that is very clean and quiet. With TIG(tungsten-inert-gas), you could potentially weld in a suit and tie.

Photobucket

Unlike the other forms of welding in current use(MIG and “Stick”), TIG welding is not as automated and requires 3 appendages:

  1. 1 hand to hold a torch(which utilizes a piece of tungsten rod to strike an arc and a hose to supply protective argon gas)
  2. 2nd hand to hold a 14″ length of filler metal wire that you dip into the puddle of metal formed by the torch
  3. 1 foot to operate a pedal controlling the heat/output of the “torch.”

Photobucket

TIG welding is a very slow, rhythmic process that requires the welder to sync his breathing with the welding steps: pulse- retract/dip wire – move forward – pulse – retract/dip wire – move forward.  Think of stitching or knitting.

Photobucket
Many of the fabrication techniques are borrowed from the aerospace industry. Drilled holes are flared in a press to accomplish 2 things: adding a 2nd plane of structural rigidity and reducing weight.

I fell in love with desert racing in college.  I made the bold move to leave school to pursue a life building race cars.  At the time, I did not even know how to change my car’s oil.  It was never meant to be, since my family viewed all automotive work as something left for “paid laborers.”  After years of devoted work, I was performing finite stress analysis of control arms on my laptop, TIG welding suspension and chassis components for 2 shops, racing in the Baja 500, and teaching myself the process of making fiber reinforced plastics.

under my bed
The bottom of my futon during my desert racing years: sleeping on top of $12,000 worth of shock absorbers.

Unlike pavement based motorsports, media coverage(and therefore funding) is difficult to provide over a 200 mile desert course.  Because of that, the motorsport is driven by the pockets of the participants: rich, White folks.  When the economy went bad, the competitors had less money to devote to their recreational endeavors.

Photobucket

When I was being taught at Baker Motorsports, Jason O’s truck was the vehicles I worked on. The 1st project John Baker had me do was to trace out the rear shock mounts on a template. After referencing the template for a perfect fit, I hand cut the design out a stock sheet of 1/8th chromoly steel with a band saw. The edges were repeatedly sanded down by hand until John could no longer see a reflected wave of light when the piece was held up to his eye.

Photobucket

Photobucket

Photobucket
Typical desert vehicle chassis underneath its fiberglass body. Although some classes may require “stock frame rails”, every vehicle is mostly a huge network of tubing.

Photobucket
This is a photo I took of a chassis that sat at my San Luis Obispo shop. After work, I would stay late for up to an hour and follow the tubing of this vehicle with my eyes. Normile Concepts built the vehicle.

Photobucket
This is the same truck from the shop after completion

Photobucket
The same truck from the shop on display with its bedside off

05
Feb
10

Pizza Making – Not another crappy homemade pie…

Photobucket

I don’t want to make pizza that is good for a “homemade pie.”  I want to make pizza that is better than your best delivery pizza.  More importantly, I want to make authentic pizza.

  • Reasonably thin crust, not thick and chewy.  It’s not a cracker, either, though.
    • Airy crust, not dense cardboard.  Each bite should have the flavor of high quality bread.  Texture should be crisp, yet retain bread-like qualities.  Lightly charred bottom.
    • Sauce made from imported San Marzano tomatoes.
    • Fresh mozzarella, not the shredded, cheap stuff.  Higher quality cheese =  lower quantity of cheese.

    Photobucket

      1. Dough – High gluten flour, yeast, salt.  I add 2 more things that I find helpful with home cooking.  I also add rosemary and some other nonsense.  I use a Kitchenaid stand mixer for 10-15 minutes.
      2. To make good pizza, you need high heat.  To do this at home, I use the broiler, and use a stone 2 inches underneath the heating element.  The dough cooks in less than 2 minutes.
      3. To compensate for my home oven’s lower heat(500), the dough must be thin.  Don’t worry, the yeast will create an airy product.  To stretch the dough thin, I use a light underneath plexi-glass to help me.  The light allows a consistently thin layer of dough without making holes in thin sections.

    • Stuffed Pizza

      Photobucket
      Lay bottom layer of dough on a cast iron skillet. Insert filling. I used spinach, cheese, chopped pepperoni and some other stuff I can’t remember.

      Photobucket
      Put top layer of dough on top. Use a wide knife to use the edge of the skillet as a cookie cutter when cutting off excess dough.

      Photobucket
      Bake at 375 or 425 for 10 minutes or so… I can’t remember these details. I don’t make these anymore because it takes too damn long.

      Photobucket
      Put a top layer of cheese and toppings. Bake an additional 5 minutes.

    05
    Feb
    10

    Latest Bike Stuff: Bike Build for Dave and more of Katherine’s Bike.

    Dave’s Bike

    Photobucket
    Dave is 6’4, so I had to find a huge frame. Being a very good friend, this huge frame had to be something special.

    Dave is a very good friend. When he visited me in Seattle, I decided to surprise him with a gift: a bike to ride around Seattle with, and to take home. Now, this was not going to be some crappy, half-ass rig. I wanted to make this a special item that was picked, piece by piece, for him.

    I waited patiently and found a black Sakai lugged frame which was a size 62 or so.  The lugs and paint were in very good condition. Above all, safety and utility were prioritized. Therefore I made sure that I got a high quality front brake and decided to make it a single-speed rig.

    Photobucket

    Special Accomodations:

    1. F.Brake:  I always use exceptional brakes on bikes built for others, no matter how big the budget is.  I took a very nice Canecreek dual pivot brake from Katherine’s old collection to put on here.  I replaced the stock pads with the best pads possible: Kool Stop.
    2. Photobucket

    3. Seat: Cheap seats are lame.  I took the one off my mountain bike and put it on Dave’s bike.
    4. Crank length: Had to find a long crank(175mm) because of his height.  Compatibility with newer style bottom brackets will eliminate maintenance for Dave.
    5. Gearing: Dave is not a frequent cyclist, so I took the  regular 46/16 gear ratio and notched it down a little to make it easy on his knees.  Oh yeah, this is a single-speed.
    6. Wheels: Cheap wheels are heavy and break easily.  I took my old road wheel and re-laced it.  This involved truing the wheel from the inside the rim, instead of the outside.  This was a 16 spoke unit, so I had to find an appropriate low-spoke front whee.  At Recycled, I found a used Bontrager wheel that fit perfectly.  Both wheels have paired spokes with a low spoke count.
    7. My rear wheel and Elliot
      Dave’s rear wheel while it was on bike, which is now Katherine’s frame. I told you it had a low spoke count!

    Katherine’s Bike’s Update and Specs
    Photobucket
    Don’t mind the fork on top of the stem. I eventually cut the fork, and used its steerer tube as a headset spacer. Polished, of course!

    1. Brakes: Mini V’s polished to match the rest of the chrome.  Exceptional braking for Katherine gives me some peace of mind.  Stock pads were replaced with the best pads:Koolstop.  When looking for a fork, I made sure it could accommodate v-brakes since they are MUCH STRONGER than any road brake.  For the rear, I took the beautiful Campagnolo Chrous brake off my LeMond racing bike.
    2. Photobucket

    3. Steering: Lugged Cyclocross fork to match the lugs on the bike.  The higher a-c(axle to crown) height brought the geometry from 73-71 degrees.  This would allow Katherine to have a much more stable bike in a non-racing situation.  The steel fork was much more comfortable than the stiff aluminum piece that it replaced.
    4. Photobucket

    5. Cranks: Shimano 105 triple, 165mm.  Keeping safety in mind, I know medium length cranks will hurt shorter people.  To get your hands on 165mm cranks, you often have to make a special order.  I used the ones I took off my Redline.
    6. Wheels: Rolf Vector Pro 14 & 16 spoke wheels.  You will not find these around, anymore.  To add to the inconvenience, you have to take the tire/tube off to true them!  To find a matching rear, I got a spare rim from work, and bought the rare hub/freehub/spokes/nipples/tool from a mechanic at work.    I painted the spokes black, and built up the rear wheel.
    7. Tires: Armadillos and Gatorskins.  I probably would not want Katherine fixing a flat at night, so I got kevlar tires.  I also got much bigger tires to provide more stability and a more comfortable ride.
    8. Gearing: 36/42?  13-27 in the rear? Katherine is a marathon runner so she needs the gearing for the hills.  I started with a wide rear cassette and a single front ring.  I moved to a dual ring and put a chainring plate on the outside to keep her jeans from getting sucked in.  It looked nice, too.
    9. Flat bar setup.  After a while, we realized that she needed a much more upright position.  I got a white low-rise bar with white/green Ergon grips(these things are wonderful).  Shifters HAD to be swapped for flat bar shifters.
    10. Photobucket

    Photobucket
    New stem for Katherine’s bike immediately after sandblasting at Seattle Powdercoat(ironically to remove the black powdercoat). Sorry for the out of focus shot. My camera sucks and I have a new one now.

    Photobucket
    Stem after polishing. You can see the higher grit “red” polishing compound still in the weld beads. I still had to go through 1-2 more polishing cycles(low to high grit) and paint a protective finish. After an exhausting search, I finally found a high quality clear coat called Permalac. It is used to protect outdoor bronze sculptures from oxidation.

    Latest Wheel Build: 650b Mountain
    I realized that it’s hard to get spokes for a 650b wheel. I downgraded by spokes to find a proper length that will fit a wheel that sits right in the middle of a 700c and 26″ wheel. Unable to get DT Revolution spokes 14/17/14, I realized that I could only use straight gauge spokes. Finally, I bought Phil Wood butted spoke blanks and had them custom cut at Aaron’s Bike Repair.
    Photobucket

    Photobucket

    20
    Apr
    09

    Downhill Mountain Biking

    Photobucket
    This is not me!

    I lived a dream, and that dream ended fairly quickly.  I always loved the idea of “getting air” on anything: a 4 wheeled vehicle, bike, motorcycle.  The problem was that I could not do it!
    Photobucket
    race course at Port Angeles where I raced

    I jumped a little on my mountain bike as a kid, but nothing serious.  In 2008, at the age of 26, I started my first season of downhill mountain bike racing.  It felt weird to finally “need” more body protection: a full face helmet, goggles with tear-offs, knee/elbow pads, chest/back protection, and even hip/tail bone padding.

    Photobucket
    Sorry for the low quality picture. It’s the only picture I have of myself

    I started learning the correct technique and gave up my clipless pedals for the first time in my bike riding life.  It was weird!!!

    Photobucket
    Starting ramp at Port Angeles. Place for butterflies.

    Photobucket
    This is the bottom of the chute in the 1st picture

    20
    Apr
    09

    The Green Bike(aka Katherine’s Bike)

    Photobucket
    The green bike started its life as a gray/silver Specialized Allez of the early 1990s.  At the age of 12, I used this gray bike to start road racing.  It was the bike I rode to my 2nd place in my first state championship(I gave away the win..  Team politics)  My sister, Annette, rode this same bike in her first triathalon.

    Photobucket
    Bike mock-up with the 1st set of bullhorn bars. The wheelset is temporary. Yes, they have 16front-18rear spokes, not 14-16 setup of her current Rolf wheelset.(Standard wheels have 32 spokes)

    I resurrected this bike after I moved to Seattle.  About a year of personal use, I used the frame to build Katherine’s bike.  It was a pretty close call, since I had somebody interested in buying the frame.  The 1st paint job(darker green) are in the last 3 photos.  The 2nd paint job used urethane automotive paint and included the plaid bands.

    I really cannot believe how much time I put into this bike.  On every lunch break, my coworkers saw me sanding away on the steel lugs.  I used numerous grinding wheels, sanding wheels, emery cloths, emery impregnated rubber wheels, sand paper, and files to shape the lugs.

    Photobucket
    Top: A stock Allez with blocky, hard edged lugs.
    Bottom: My carved, rounded lugs immediately after the unmasking.

    Photobucket
    This is the lug preparation/polishing process:

    1) Previously, the bike was entirely painted, lugs and all.  I used chemical strippers and elbow grease to remove the finish.

    2) Once the paint was removed, the lugs were very “square”.  There was a “step” profile with a sharp corner.  I rounded the corner of the lugs down to give it that smooth, rounded, bulge look.

    3) THEN, the polishing began.

    Photobucket

    A little bit about chrome on bikes: Any chrome you see on a bike is from chrome plating or stainless steel.  Stainless steel lugs are a much lighter color and sand/polish down fairly easily to a mirror like shine. Now, this bike did not have ANY stainless steel on it. I took regular carbon steel, and used about 7 steps of abrasives to gradually, and progressively bring the surface down to a polish.  The only way to get it to shine is to make the surface extremely level… with no imperfections to create light infractions.  That’s all the matte finish of steel is: tiny, tiny discrepancies on the surface.

    I used a rough grit to take down the surface, and shape the lugs.  That was followed by finer abrasives with higher rpms.  The last 2 steps involved using cloth wheels with an abrasive paste.  If too rough of a grit was used AFTER a finer grit, it would destroy the polish, leaving scratches across the surface of the steel.  Re-polish?  No, you have to remove that top layer of steel to level it out to the new lows of the faint scratches.  That means a rougher grit.  Yes, you have to start all over from the beginning!

    20
    Apr
    09

    Here’s my first blog post.

    Photobucket
    Rempe, Elliot, and me on the death bridge

    Photobucket
    Elliot at the University Bridge

    Photobucket
    I used this photo for my dad’s birthday card. This is my old bike which is now Katherine’s current bike. These Syntace bars are no more; the bike landed bar first into the ground and bent

    Photobucket

    Photobucket

    Photobucket

    Photobucket


    May 2024
    S M T W T F S
     1234
    567891011
    12131415161718
    19202122232425
    262728293031